How Embroidered Patches Are Made
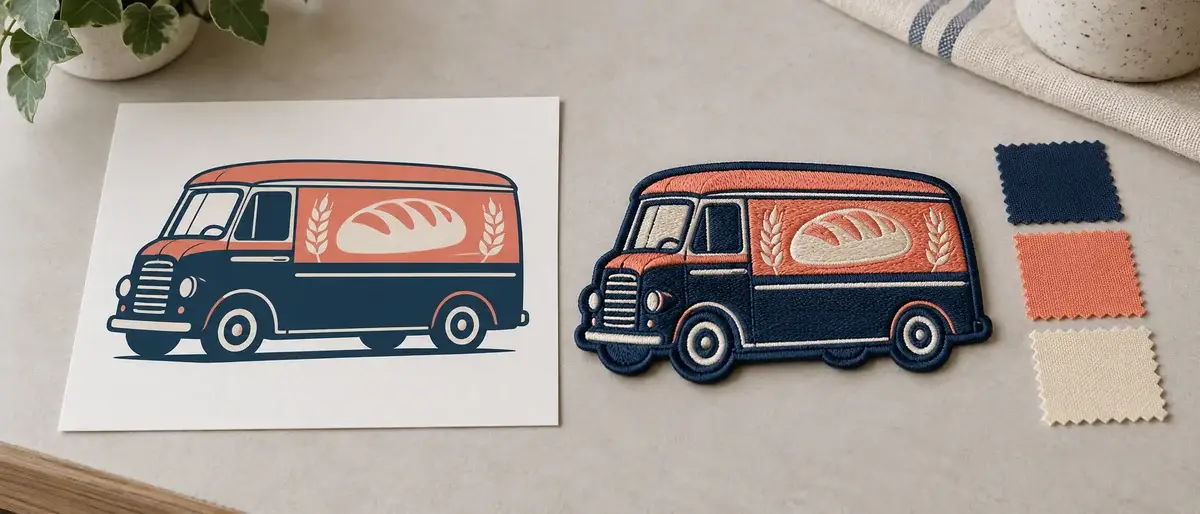
Six stages between a logo and a finished patch. Most of the decisions that determine how it looks are made before a single stitch goes down.
AT A GLANCE: KEY TAKEAWAYS
- Most of what determines how a patch looks is decided in digitizing, before anything is sewn.
- Underlay is invisible in the finished patch and it is why the top stitching sits on the fabric rather than sinking into it.
- Fabric pulls inward as stitches go in, so shapes are extended to compensate. Gaps between colors are a compensation failure.
- Where the construction calls for it, a new design gets a test sewout before the full run rather than after.
- Two checks: the first piece off the run is approved, then every piece is inspected against the approved proof.
An embroidered patch looks simple and is not. Between a logo arriving and a finished patch leaving there are six stages, and the ones that determine how the thing looks mostly happen before any thread moves.
1. Artwork review
The first thing that happens is someone looks at your artwork against the construction and the finished size and decides what can be made.
This is where small type gets flagged, gradients get identified as something that has to be rebuilt, thin lines get noted as too fine to sew, and a design that is fighting its intended size gets called out. It is also where a supplier should tell you if a different construction would serve the design better than the one you asked for.
Rough artwork is normal at this stage. A low-resolution file, a scan or a photograph of an existing patch all get rebuilt by hand rather than traced automatically, because auto-tracing follows every wobble in a soft edge and produces paths with hundreds of unnecessary points.
2. Digitizing
This is the stage that decides most of the outcome, and it is the one buyers know least about.
Digitizing is not a file conversion. An embroidery machine cannot read a drawing: it needs to be told where to put every stitch, in what order, in which direction and how densely. A digitizer makes those decisions and writes them into a file the machine follows. The same design sewn on flat twill, a structured cap front and a stretch panel is three different files, not one file used three times.
Four decisions carry most of the weight:
Stitch type. Whether each shape is a satin column, a fill, or a running line. A satin has a practical width range, so a shape too wide gets a fill and one too narrow gets a run. This is what gives embroidery its texture and sheen.
Direction. The angle the stitches run. It is what makes thread catch light, and it is why a well-digitized patch has depth while a poorly digitized one looks flat.
Density. How close the stitches sit. Too loose and the base shows through where it should not; too tight and the fabric puckers or the needle breaks.
Sequence. The order shapes are sewn, which decides what sits under what and how much the fabric is moved around before the last element goes down.
3. Underlay and compensation
Two things that are invisible in the finished patch and account for a large share of the difference between good and bad embroidery.
Underlay is stitching placed underneath the visible work. It stabilizes the fabric so it does not shift as the design is sewn, and it gives the top layer something to sit on. Without it, the top stitching sinks into the base instead of standing on it, and the design looks thin.
Pull compensation accounts for the fact that fabric moves. Stitches draw the material inward as they go down, so shapes are extended slightly so they still meet where they should once everything has settled. How much depends on the fabric, the density and the size. Gaps between colors that should touch are the most common visible sign that compensation was wrong.
4. Test sewout, where the construction calls for it
Some new designs get sewn once before the full run, so the file can be corrected against a real result rather than a screen preview. Screens do not show pull, they do not show how a satin behaves at its width limit, and they do not show what a color looks like next to another color in thread.
This is construction-dependent rather than universal: it happens where the build calls for it, not on every order.
5. Stitching and edge finishing
The run itself. Thread colors are loaded, the machine follows the file, and each color goes down in the sequence the digitizer set.
Then the edge, which is a design decision made earlier and executed here:
Merrow wraps an overlocked thread edge around the outline. It suits simple shapes such as circles, ovals, shields and rectangles, because the machine travels a continuous path around the patch.
Laser or hot-cut cuts the patch to shape and seals the edge as it cuts. It follows tight curves, thin points and die-cut logo shapes that a wrapped edge cannot travel, and it sits flatter and thinner.
Hand-cut is used where the material or the build calls for it, including felt, chenille and handmade crests.
Backing is applied at this stage too, chosen against the garment rather than by default.
6. Two quality checks
Not one. Two, and they catch different things.
First-piece approval. The first patch off the run is checked before the rest continues. This catches a file problem, a color problem or a density problem while it is one patch rather than a box of them.
Every-piece inspection. After the run, each piece is inspected against the approved proof. This catches the things that go wrong partway through a run rather than at the start.
The approved proof is the reference for both checks, which is the practical reason it is worth reading carefully before you approve it. If something is defective, or the material does not match the proof, it is remade, and if it cannot be resolved you get a refund.
Why two suppliers produce different results from one logo
Nothing above is proprietary. Every embroidery operation does some version of it. The differences show up in the decisions rather than the steps: how carefully the artwork was reviewed, how much thought went into sequencing, whether underlay was chosen or defaulted, whether compensation was tuned to the actual fabric, and whether anyone looked at the first piece before running a thousand more.
That is why the same logo sent to two suppliers comes back looking different, and why the useful question to ask a supplier is not what equipment they have but what they will tell you about your artwork before they take the order.
Frequently Asked Questions
What is digitizing and why does my patch need it?
Why are there gaps between colors on some embroidered patches?
Do you make a sample before the full run?
How is quality checked?
Does the same stitch file work on a cap and a flat patch?
Latest Articles
View All Articles
PVC, Silicone and Rubber Terms
Three words, two materials, and a lot of confusion. What people mean when they say rubber patch, and why the distinction matters once you are ordering.
READ MORE
How to Design a Custom Patch
Most patch designs go wrong in the same order. Here is the sequence that avoids it, starting with the one decision everything else depends on.
READ MORE
Planning Patches for a Team
A group order is mostly an administration problem wearing a design problem's clothes. Here is what to settle before you send anything.
READ MORE